1. Start with old broken crayons, I had a bazillion from my years of teaching, and choose your colors. Then peel off the wrappers (this was by far the worst part of the project! And if you were wondering, yes, you can get a paper cut from a crayon wrapper).
 2. Sort the crayons into a muffin tin by color (or mix colors if you want a rainbow crayon). Instead of a regular muffin tin, I bought a silicon shaped muffin "tin".
 3. Bake the crayons at 280 degrees for about 25-30 minutes (this is the time in my mold, a metal one will be different). This pic is mid-melting.
 4. Once the crayons are completely melted, take them out of the oven and set aside to cool. Since I am NOT a patient person I put mine outside in this chilly weather and they were set in about 30 minutes.
 5. After the crayons are cooled and set, turn the tin over and pop them out.
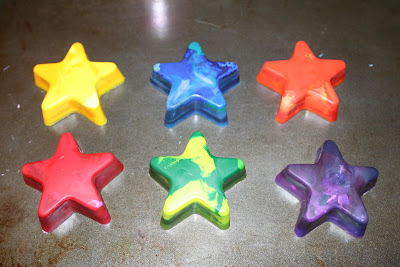
 I love how these turned out, but wish the red, orange, and yellow had a little more marbling to them. The green is by far my favorite. The blog I got the directions from suggested adding glitter to the crayons before baking, but I didn't have any. I plan on getting some for my next batch! I also read elsewhere online that you shouldn't use really cheap crayons because the wax and coloring will separate. My crayons are a mixture of Crayola and cheapy ones.


LOVE THEM!!! You are so creative and these crayons are an awesome idea.
ReplyDeleteI just did ours today with aluminum and tin pans- 3 different shapes/sizes. Just used what we had. I did spray some cooking spray in them, wiped off excess and only had trouble maybe getting one out of the corn shaped mold. I def. recommend using some spray for the metal pans like I used.
ReplyDeleteThanks for sharing this cool craft! Oh and I posted it on my blog with a link back to here ;)